Overview
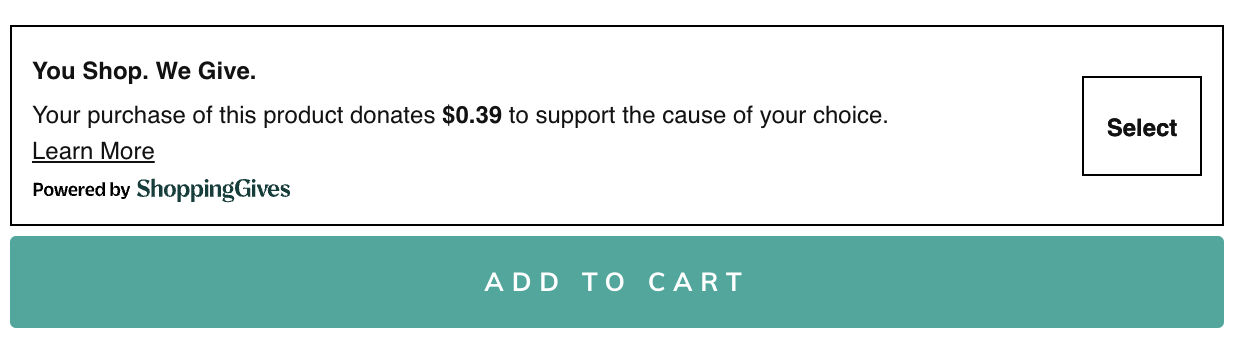
Power donations on every purchase with our merchant-funded Store Donation on Purchase campaign! With ShoppingGives, you can customize how much you wish to donate per eligible purchase — these customization options allow you to create a donation experience that best fits your brand’s giving goals.
Step-by-Step Setup
1. First, you'll want to decide on which giving experience you'd like to offer from the Global Settings page, which can be accessed from the left-side menu:
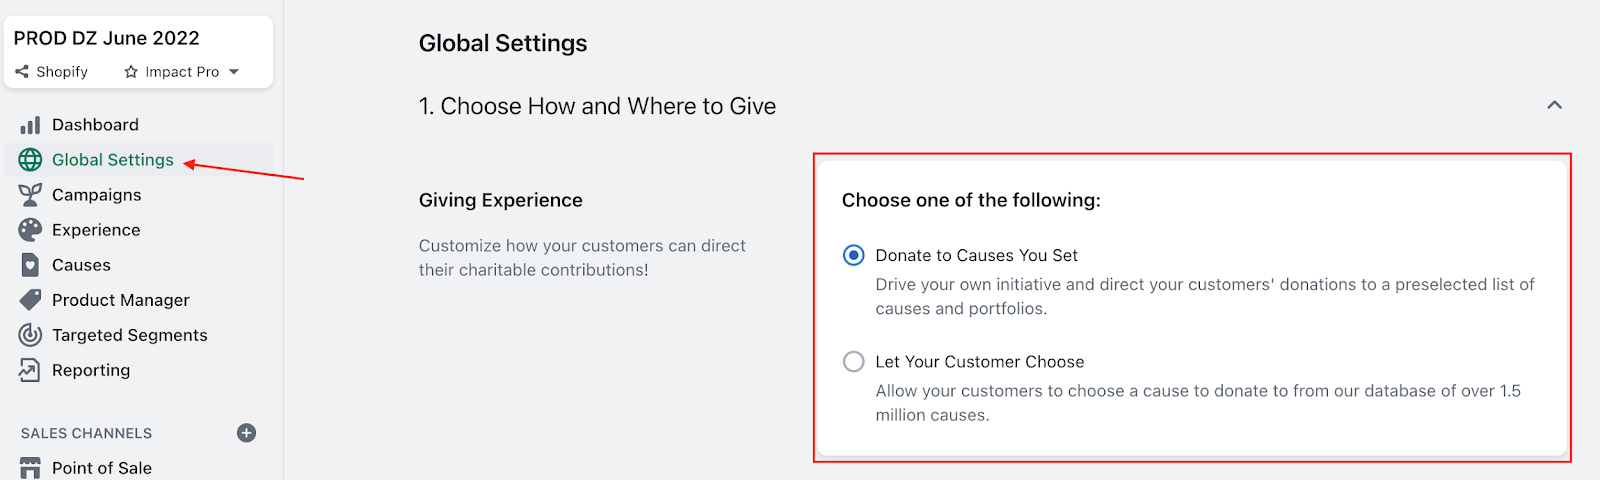
- If you wish for all donations generated on-site to support the cause(s) that YOU select as the merchant, select the Donate to Causes You Set experience
-
- With this experience enabled, if multiple nonprofits are selected as Featured Causes, each donation will be evenly split amongst the selected causes
- With this experience enabled, if multiple nonprofits are selected as Featured Causes, each donation will be evenly split amongst the selected causes
-
- If you wish to allow YOUR CUSTOMERS to select which of your Featured Causes to support with their purchase, select the Let Your Customer Choose experience
-
- With this experience enabled, if multiple nonprofits are selected as Featured Causes, your customers will have the ability to select which of your featured causes they wish to support with the donation generated with their order.
- As an Impact Starter partner, you will be required to set one of your Featured Causes as a Default Cause when utilizing this giving experience — this way, if a customer does not select a nonprofit to support, a donation will still be generated towards your default cause
- With this experience enabled, if multiple nonprofits are selected as Featured Causes, your customers will have the ability to select which of your featured causes they wish to support with the donation generated with their order.
-
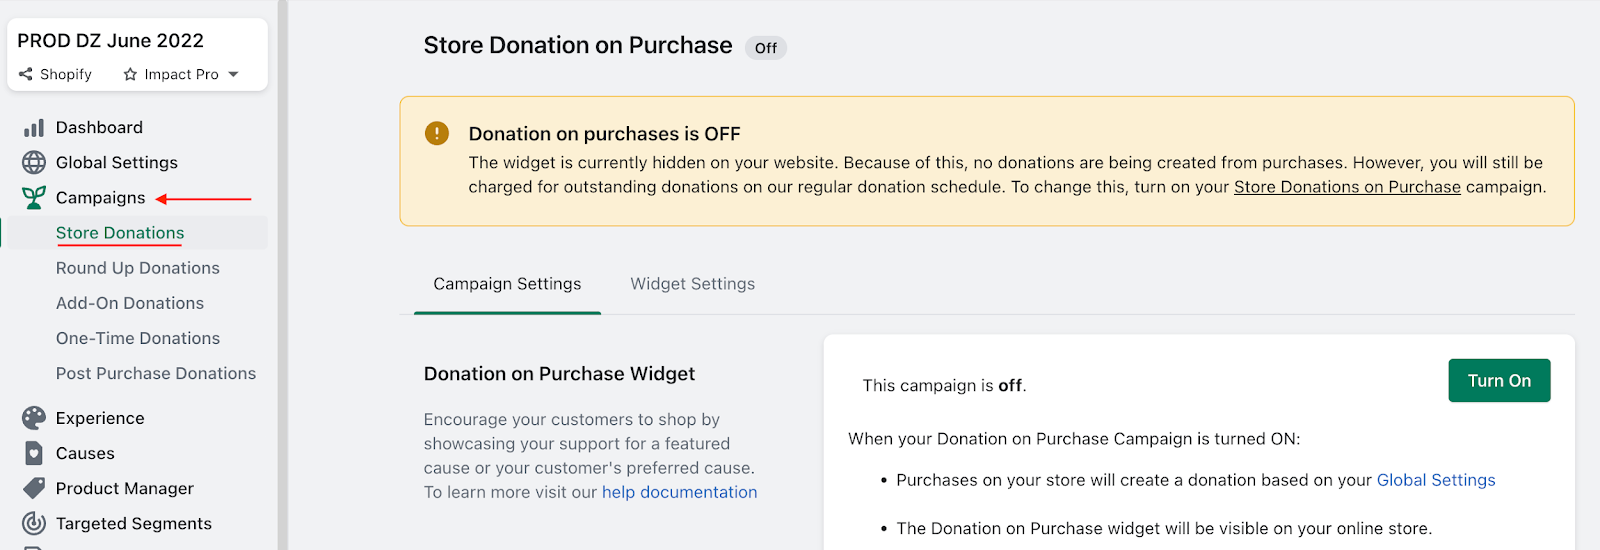
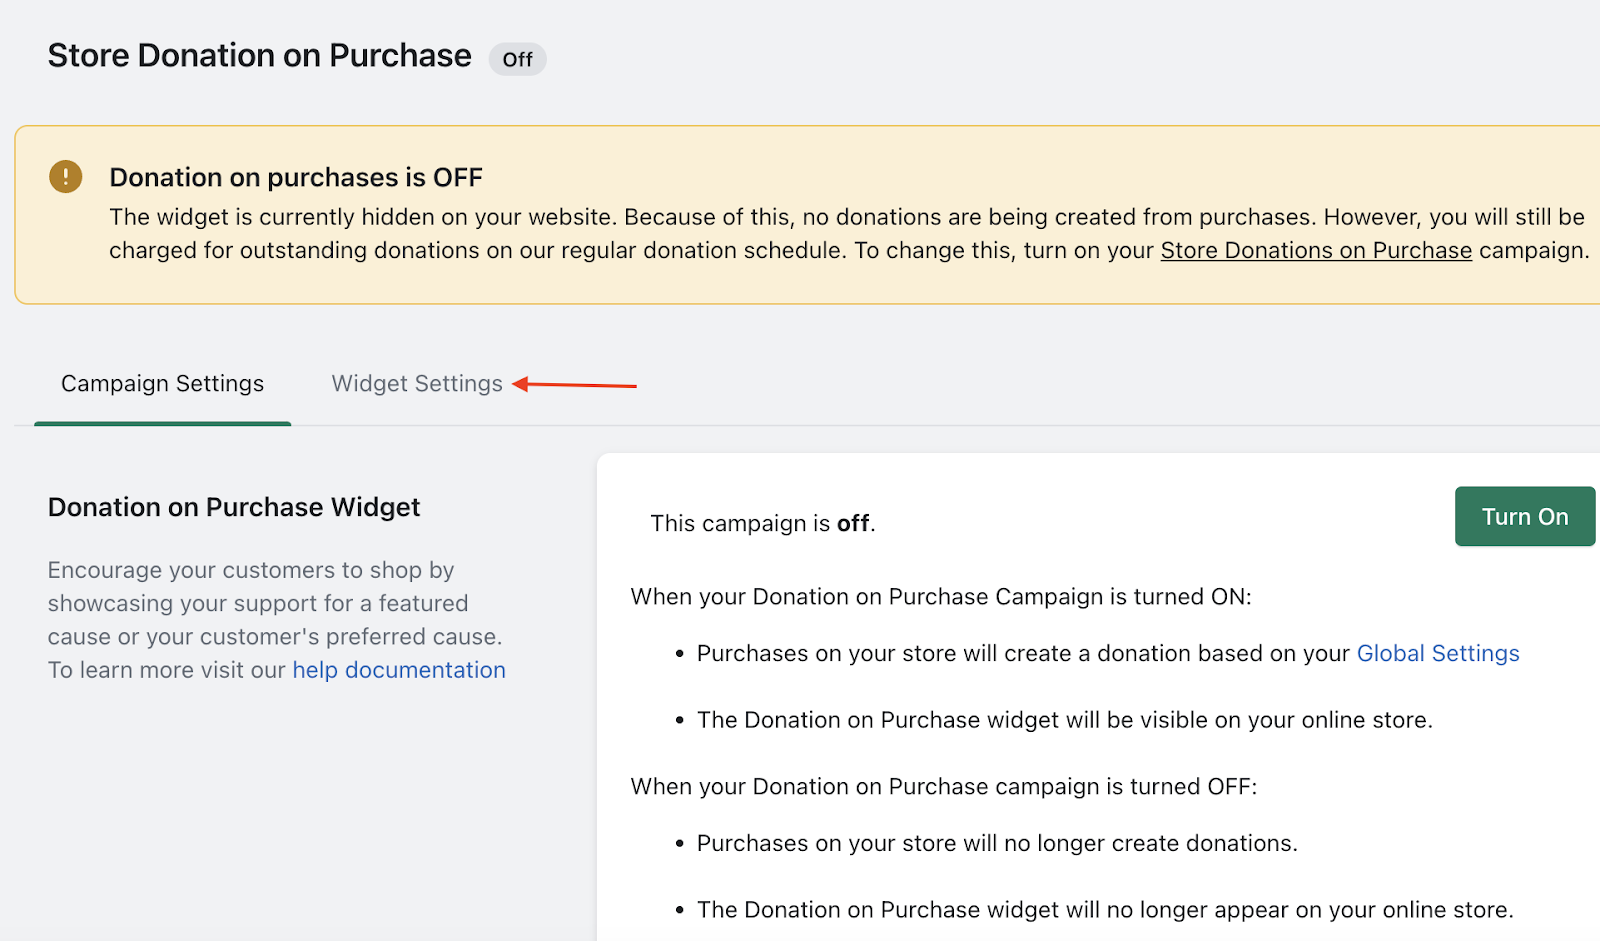
2. Once you've selected your giving experience, you're ready to set up your Store Donation on Purchase campaign by selecting Campaigns from the left-side menu — this will bring you to the Store Donation on Purchase campaign page as seen below:
To adjust how much will be donated with each eligible purchase, scroll down on this page until you reach the Customize Donations section seen below:
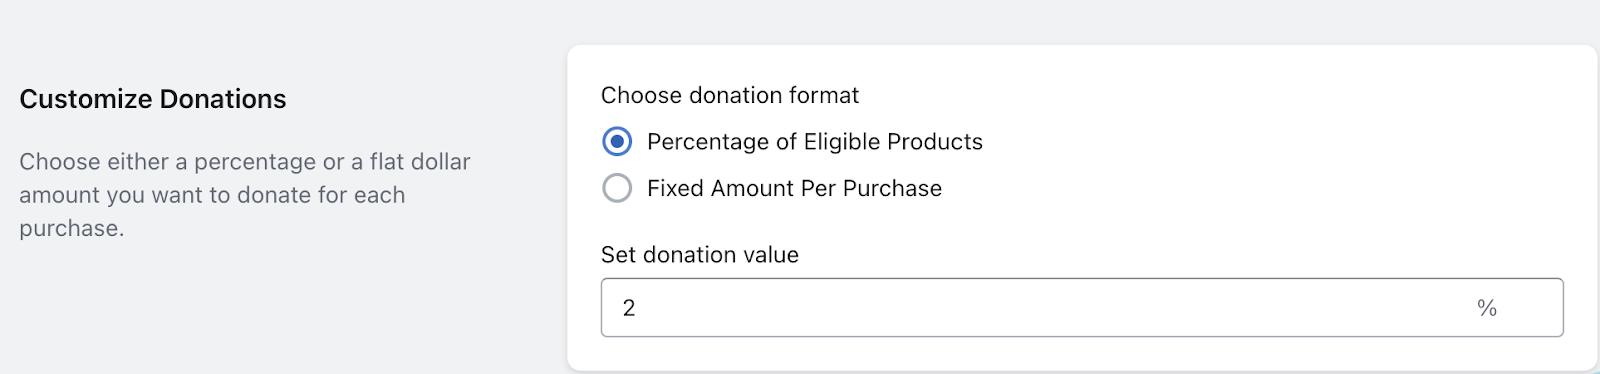
- Select Percentage of Eligible Products to donate a percentage of each eligible purchase (for example, 2% of each eligible product is generated as a donation)
- Select Fixed Amount Per Purchase to donate a set monetary amount with each eligible purchase (for example, $0.50 is donated with every eligible purchase)
- Save your changes at the top right of the page!
3. Now that you've configured the donation amount, you'll want to place the Store Donation on Purchase widget on-site — to start, scroll back up to the top of the Store Donation on Purchase campaign page, then select the Widget Settings tab seen below:
From the Widget Settings tab, first select which method you wish to use in order to assign a location on-site for the Store Donation on Purchase widget:
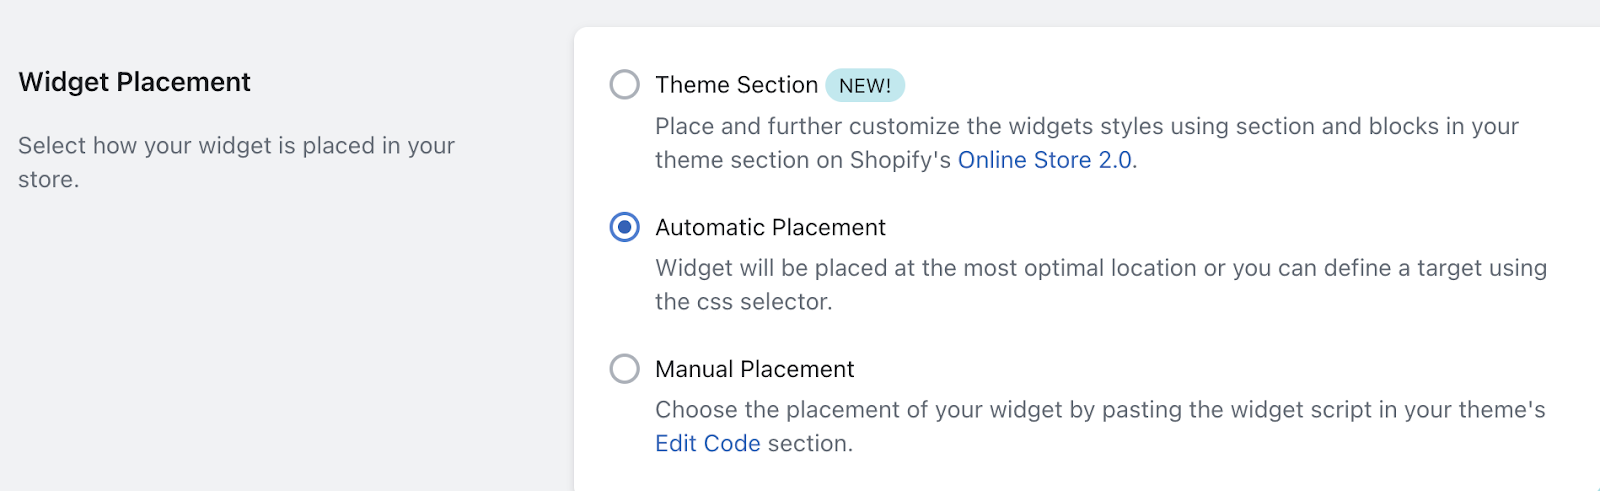
- Theme Section placement (available only on Shopify 2.0 themes) allows you to drag and drop our widgets into your desired location(s) on-site, as well as to customize different aspects of the widget itself — click here for a guide to Theme Section placement and customization!
- Automatic Placement will, by default, attempt to place our widget at the optimal locations above the "Add to Cart" button on the Product Page as well as above the "Checkout" button on the Cart page, however you can manually target any location on-site for this placement method by utilizing our CSS Selector — click here for a guide to Automatic Placement!
- Manual Placement allows you to choose the placement of our widget by pasting the widget script where you would like it within your theme code itself — click here for a guide to Manual placement!
- Recommend placement options for the Store Donation on Purchase widget include the Product page, the Cart page, and/or at Checkout (Please note: widget placement at Checkout requires Shopify Plus)
4. Now that you have configured your donation campaign and placed the Store Donation on Purchase widget on-site, you're ready to activate the campaign by heading back to the Store Donation on Purchase campaign page:
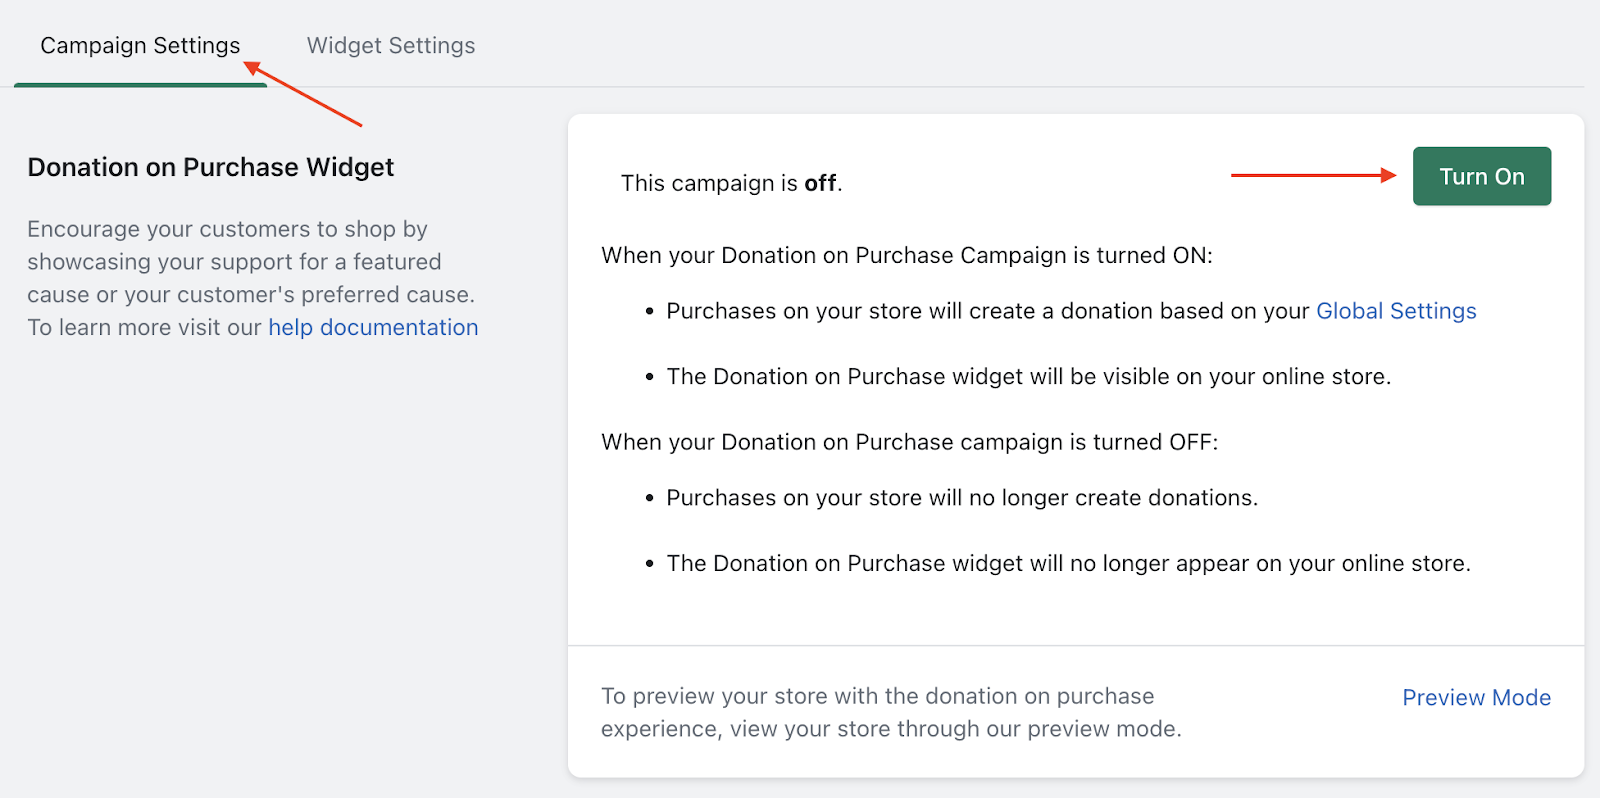
To activate the campaign, simply select the Turn On button pictured above, and save your changes at the top right of the page!
Once you've activated the Store Donation on Purchase campaign, the widget(s) placed will appear live on-site, and purchases on your store will begin creating donations based on your Global Settings.
Store Donation on Purchase with Shopify POS
If you have the Shopify POS sales channel added to your giving program, you'll also have the ability to turn the POS Store Donation on Purchase campaign on or off from the Store Donation on Purchase campaign page:
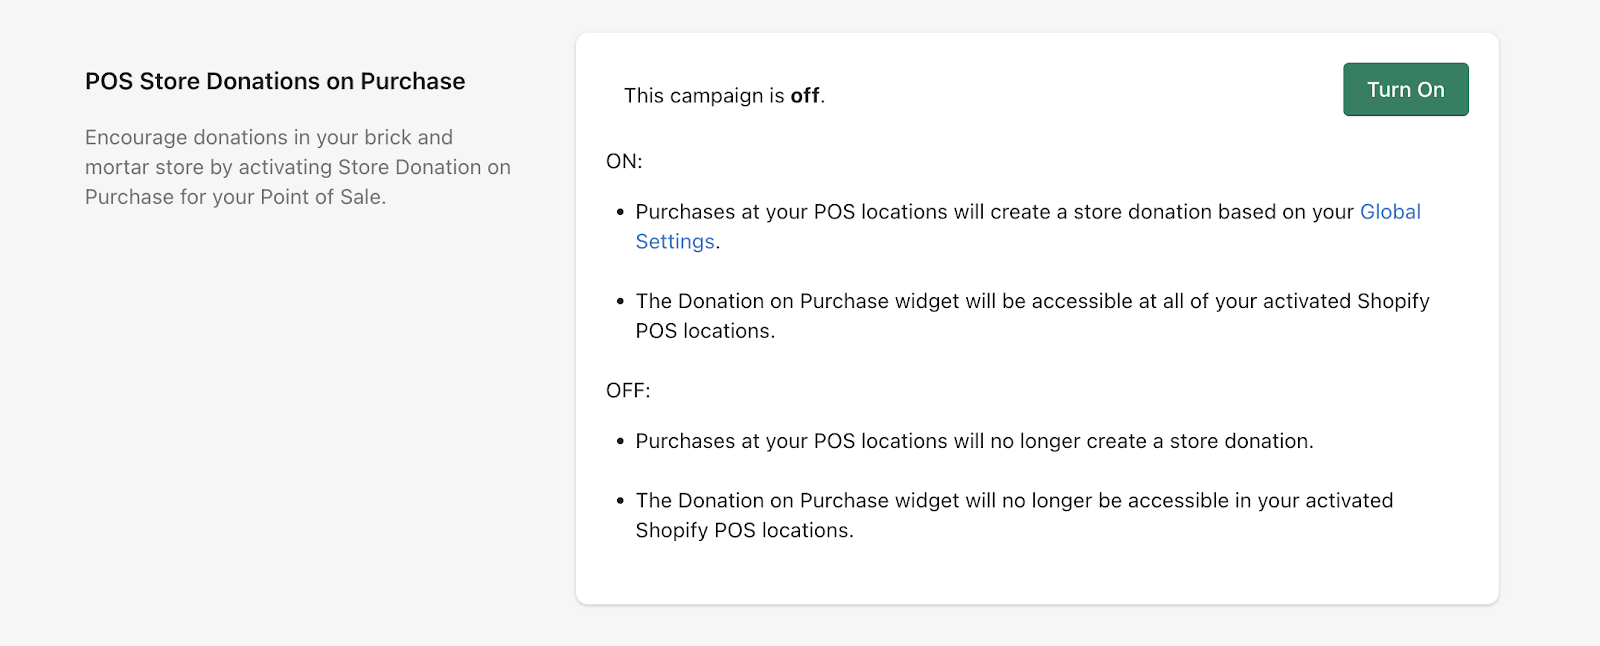
By default, this campaign will be turned off, even after you’ve added the sales channel.
In order to start generating donations on your Shopify POS orders, you’ll need to turn the campaign on using the green Turn On button shown above.
To configure our Shopify POS integration, follow the guide linked here!
Frequently Asked Questions
Q: Can I preview the widget on-site prior to activating the giving campaign?
A: By utilizing our Preview mode, you absolutely can! Here's a handy guide to doing so.
Q: Is it possible to only donate on select products?
A: Product exclusions become available as an Impact Plus partner, or once you have purchased the Capsule Collection feature a la carte as an Impact Starter partner. If the feature is available to you based on your plan, you can include or exclude select products from generating donations as well as customize the donation amount itself at the product level with our Product Manager by following this guide.
Other questions? Reach out to us at support@shoppinggives.com — we're here to help!